Intel's Ronler Acres Plant

Silicon Forest
If the type is too small, Ctrl+ is your friend

Showing posts with label 2001 Chrysler Sebring. Show all posts

Friday, July 31, 2015

Land of the Free, Home of the Brave


2012 Chrysler 200 Battery Replacement
Tune from a Chrysler Super Bowl Ad featuring Bob Dylan (!?).
Iaman is having car troubles:
The Arizona heat is killing my Chrysler 200 car battery. It took a while to find the battery...."there it is in the wheel well"...I think like the Sebring. Of course autoparts stores will not replace that battery. Do you think the music is a sarcastic commentary on this battery placement design?
2001 Sebring left front wheel well with inner plastic fender removed.
Battery visible at left.

Friday, February 7, 2014

Snow

 
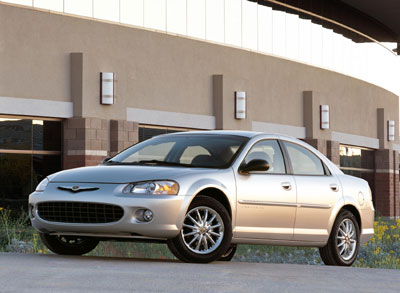
Yes, it's Chrysler Sebring, the infamous. Remind me to tell you the story of its miraculous resurrection.

More snow than I seen in a coon's age. Well, a couple three years anyway. Schools and many businesses are closed. Naturally, since my wife had the day off she wants to go shopping, and since I have such a busy schedule, I got elected to drive. We took my super awesome four wheel drive monster truck which was a good thing because everybody else was having a hard time of it. Little slopes that you wouldn't even notice in dry weather became automotive sledding hills, which naturally led to confusion, congestion and coughing. We managed to avoid any such entanglements and managed to get home in time for the Portland Trail Blazers versus Indiana Pacers basketball game. It was all tied up when I checked in a few minutes ago and Lillard had just been fouled/committed a foul, and there was going to be a delay, so I wandered off so I wouldn't annoy the enthusiasts in my family.

Sunday, December 8, 2013

Chrysler Engine Repair Update (Post-Mortem?)


Our 2001 Chrysler Sebring is dead again. It had been sitting in the garage for two years waiting for someone to work on it. A few weeks (months?) ago we managed to gather the necessary motivation and started work. It took us about a month to pull the engine (pull the car off the engine), R & R (remove and replace) the head gaskets, and put it back in the car. Actual time spent working on this project was maybe 20-24 hours, but for some reason it felt like a friggin' ordeal. It might be because I am old, or out of shape, or not used to working on cars. Whatever, it was a mighty struggle but we persevered and eventually got it put back together, put a battery charger on the two-year-old battery overnight and the next day it fired right up. Cool. Finish putting the bodywork back together, drop it down off the jackstands and we should be good to go, right? Wrong. Now when I fire it up there is someone banging on the inside of engine with hammer. That's not good.
     But you know, it might be the timing chain. I had an old Toyota once upon a time that would make that same exact noise when the chain got old. It would stretch so much that the tensioner would not be able to take up all the slack and it would slap against the side of the case. It sounded just like a rod knocking. The Sebring also has a chain and a chain tensioner, and maybe the tensioner isn't working properly. I'll drive it over to Eric's and see what he thinks, so I put it in gear and press on the gas and we start moving, but not very fast. The engine has like no power. I could stand the banging if we had some power, at least we could get up to speed and coast most of the way, but going like this the engine will hammer itself to bits long before I get there.
    Right. So the Sebring is dead again.

Evil brass bleed screw in the upper left hand corner.
Suspicious looking 5½ right in the middle.

    I suspect that this whole disaster started because someone did not properly bleed the cooling system when they changed the anti-freeze. It's supposed to get long life anti-freeze (the orange stuff) because it's an aluminum engine and all. They would have been better off to just leave it and not do the prescribed maintenance rather than botch it like they did. My first clue should have been when my wife drove it back from Iowa and the heater wasn't working. My second clue should have been when I opened the hood and saw that someone had written "5½" on the valve cover. It looked suspiciously like a junkyard marking, meaning the engine had probably been replaced once already.


Inside the timing cover of my engine.

    My third clue was when we opened up the engine the first time and found that the insides were stained dark brown and black. Looking at pictures on the internet of other people working on this engine I notice that the insides of their engines are all bright and shiny clean, which is how a well maintained aluminum engine should look, but I am used to working on old, beat to death, cast iron engines, which never were shiny silver inside. Add ten years of the engine working like a dog and various shades of black are what you should to expect.
    My fourth clue was when we took the heads off the second time and found ABSOLUTELY nothing wrong with the head gaskets. Well, it didn't spray oil all over the engine compartment this time, so that should have been another clue.
     The only other thing was that we replaced the crank and cam position sensors while we had the engine out. Much easier to do this when the engine is out of the car, and at this point what's another $100? Might be why it failed two years ago and might be why it started right up this time, though it would be a heck of a coincidence to have rod bearing shell AND a sensor to fail at exactly the same time, or near enough to make no never mind.
    So now what? The car, except for the engine is still in fine condition, it only has 60,000 miles on it. What am I going to do with it? A junkyard might give me $300 for it. Everyone in my family is sick to death of it. I seriously doubt whether I could summon the motivation to attempt an R & R of the engine a third time, though I should be getting good at it by now .... no, don't even start thinking that. A used engine can be had from a junkyard for around $1500, and Eric tells me it's a 14 hour job to R & R the engine, for which he would charge $1200. So for less than three grand I could be back where I started, which is a running car with a dubious future.
    On the other hand I could attempt to repair this engine, but that is likely to be at least as expensive as buying a used engine. Just buying the gasket sets and head bolts this time cost over $300. I was just working on the top end, now we'd be working on the bottom end which means crank and rod bearings and possibly a new crank and rods, and those would definitely be expensive. So far I've sunk somewhere between two and three thousand dollars into this project for a car that might be worth five or six thousand. So I'm on the horns of a dilemma. Do I throw in the towel and sell it for parts, or do I gird my loins and venture once more into the breach?
     This whole episode did have the side benefit of running both of my boys through the Pergelator's Longneck school of auto repair. Whether this will give them confidence to undertake their own quixotic repair quests or cause them to stay very far away from auto repair remains to be seen.
    Eric's estimate of the time for him to do the job made me feel a little better about our performance. the fourteen hours he quoted is just to R & R the engine, nothing about doing any work on the engine once it is out. So 20 hours for us to do the job in our garage with only hand tools, a floor jack and an engine hoist is not too bad. There were two of us, but then we spent a lot of time looking for tools. It could be done without an engine hoist, but the hoist does make it easier.


     The one piece to this story that I haven't mentioned (at least I don't think I have), is just how exotic this engine is. It's an all aluminum, DOHC (Dual Overhead Camshafts) 24 valve V6. When I was a kid and muscle cars with their pushrod-operated, cast-iron, V8's were all the rage, the only place you would have found an engine like this would have have been in something truly exotic, like a Ferrari Dino, and oh! how I lusted after a Ferrari in those days. Now it's just one of a zillion very similar engines, and no one even appreciates how special they are. DOHC and 4 valves per cylinder are just a couple of bullet points on the marketing brochure, and they might just be one bullet point. I, too, have become somewhat less impressed. Used to be when I did any kind of engine work I always cleaned all the parts both inside and out. Now I just make sure I set them down with the gasket surfaces facing up so they don't pickup any extra dirt. I still clean the gasket surfaces, but that's about it. Shoot, this time I didn't even drain the oil.

Wednesday, November 2, 2011

Disaster

The Chrysler Sebring, the one my son and I spent the summer overhauling, has blown up. Coming up grapevine hill after lunch yesterday I gave it the beans and in response got a loud noise. It made it to the top of the hill but as soon I shifted into neutral the engine died. I pulled over and called for a tow.

Up till then there was no indication that there was anything seriously wrong. There were a few minor problems, like the clunk in the suspension, the whine from the alternator, something snapping down by the fan belt,  and steering wheel was on crosswise. But no indication of a real problem. Except for maybe the heat. Drive across town and the motor gets warm, as it should, but open the hood, and it seems really hot, like an oven, or an overheated motor. But we never got any of the conventional indications of an overheating motor. It didn't boil over, it wasn't loosing coolant, and the temperature gauge never got above the half-way mark.

So I don't know what went wrong. Maybe the block and heads were not flat enough. Maybe the head bolts should have been replaced. There was one funny thing, and that was when we filled the radiator with coolant it did not take nearly as much as I expected it too. So maybe there is something plugging the cooling system. But if that's the case, what's the deal with the temperature gauge? I don't know what went wrong, but things have definitely gone South and I am very unhappy.

To assauge my suffering I sit down to watch an old episode of Top Gear and they are doing a retrospective on the Rover V-8. This is interesting and a little painful. My first car was a 1963 Buick Special that I bought from my father for its' trade in value of $150. It had an aluminum V-8, the same engine that a couple of years later would become the Rover V-8, which would be used in a variety of British cars for the next 40 years.

Cars powered by the Rover V8 engine

Top Gear collected an entire fleet of cars powered by this engine for this picture. In the three years that General Motors produced this engine, they built 750,000 of them, which is more than the British built in the next 40 years*. General Motors quit building the engine because there were too many problems with the corrosion in the cooling system, due to customers using the wrong coolant in the aluminum engine.

Huh. Imagine that. Cooling problems with an aluminum engine. In case you didn't know, the engine in the Sebring is aluminum. Something is rotten in my garage and I want to find out what it is. Whether I will or not is another matter.

* Autocar has an interesting story about the Rover V-8.

Update August 2023 replaced missing picture and added YouTube link.


Friday, September 16, 2011

The Mystery of the Anti-Freeze Jug Cap

So I'm trying to purge the air from the cooling system on the Sebring. I open up a jug of anti-freeze and I set the cap down. I fiddle around a bit with hoses and funnels and coolant and then I go to put the cap back on the jug and I can't find it. It's not sitting on the car, it's not sitting on the cupboard by the door, it's not here, it's not there, it's not anywhere. Oh, well. Take the car for drive to get the motor up to operating temperature. I drive to the car wash, maybe two miles away. The car is dusty, it's been sitting in the garage for a year, it can stand a wash. I go through the wash and when we come out the other side the fan belt is squeaking. I figure it got wet in the car wash, when it dries out it will stop. It squeaks all the way home. When I get to my house I see a cap for a jug lying in the driveway. I go pick it up and see that's a cap for Zerex anti-freeze. That's weird, because I'm using O'Reilly's house brand of coolant. It doesn't fit my jug either. And the engine hasn't stopped squeaking. Matter of fact, it sounds like something is going snap everytime it squeaks.

So the Sebring is slightly demented. Once upon a time it grabbed the Zerex cap and has been holding onto all this time until today, when it saw an opportunity to grab a new cap, and being foolish and attracted to shiny things, it dropped the old cap and grabbed the new cap and started gnawing on it.

Thursday, September 8, 2011

It Runs!

Finally got all the pieces bolted on, hoses connected, wires plugged in, radiator installed, crankcase filled with oil, throttle cable hooked up (that was a pain), coolant added to cooling system, but then we find the battery is dead. I had a battery charger. I know I did. I had it for years, but now when I need it, I can't find it. Did I give it away? Did someone borrow it? Is it hiding in a corner somewhere? Don't know. In any case I couldn't find it. Took the Les Schwab battery back to Les, they put it on a charger for an hour or two and then tested and said she's a goner, dude. So they sold me a replacement at the pro-rated price of forty some odd dollars, which I thought was a pretty good deal, since I had obviously killed it by letting it set in the car, without charging it even once, for a year (!). Put the new battery in and discovered we forgot a ground strap. Connecting it seemed to improve things. It took several tries, and several sessions of head scratching, wondering what could possibly be wrong before it finally fired up and ran just fine.

Still need to install the splash shields, front bumper and wheels. I need to get a bag of those stupid little plastic jobbies they use to hold the splash shields on, but that's about it.

Sunday, August 21, 2011

Chrysler Sebring 2.7 Liter V6 Assembly Notes

This is only one chapter in the whole miserable saga.  


Installing the Camshafts and Timing Chains

Installing the timing chains was fraught with terror. I had two friends who did valve jobs on expensive overhead cam engines and both of them had to do the job over. Both of them did the job with the engine in the car, and they figured that if you didn't move the crank while you had the engine apart, it would still be in the right place when they put it back together. If both cases they were wrong. Once they had their engines assembled and turned them over, the mis-timed valves impacted the pistons and they all got bent.

This engine has dual over head cams, that is two camshafts per bank of cylinders. Two banks of cylinders means a total of four camshafts. Each pair of camshafts has a chain connecting them. The intake camshafts have a second sprocket that is driven by a chain from the crankshaft. So we have two separate situations that need to be coordinated.

Before we start putting anything together, we turn the crank so the mark on the crank aligns with the mark on the block. Normally I would expect this to put piston number one at top dead center, but not here! Shoot, none of the pistons are at top dead center. Oh! Clever devils! I see what they have done. With the crank in this position, all of the pistons are at least an inch down in their bores. So no matter what we do with heads and valves, there is no way the valves are going to impact the pistons. So we just need to not move the crank until we get the timing chains all installed.


Timing each pair of camshafts in a single head is not two difficult. Two of the links are marked and the sprockets on the camshafts are marked as well. Simply line up the marks and then mount the camshafts in the heads.


Now we can install the main timing chain and the large camshaft sprockets. This is a bit tricky. As I recall, the chain is draped over the rear sprocket and then dropped through the hole in the head. Then the front sprocket is inserted in the chain and fed upwards through the hole in its' corresponding head. Or maybe it’s the other way around. Whatever. Now the sprockets can be slipped on the camshafts where they are free to rotate. Now we can adjust the timing marks on this chain and these sprockets so they all line up.

Now we have a problem. The two camshafts in each head are in their proper relation to each other, and the main timing chain and all its' sprockets are all coordinated, but we still haven't connected the camshaft sprockets to the camshafts. This is done with a pair of bolts in each one. Unfortunately, with all the timing marks where they are supposed to be, the bolt holes do not line up. How effed up is that? The bolt holes are diametrically opposed, so the sprockets can be bolted to the cams in either of two positions. Either position will work mechanically because the crank makes one complete turn for each half turn of the cams. So icrank cannot tell if the cam is 180 degrees off. However, there is also the ignition timing to consider. Or what if we get one cam right and the other 180 degrees off? We might have a very rumbly engine.

In any case, the bolt holes were not that far off, and they were both off the same amount and in the same direction, so I simply went with the closer position. One problem is that one cam did not want to stay lined up. It was at a point where at least one of the cams was on the tip. As soon as you put it in position, the valve springs would cause it to move. The camshafts have square recesses to accomodate a square drive socket wrench extension, with that and a pry bar, you can rotate the cam into position and hold it there while you put the bolts in. A rachet won't work. As soon as you get to the position, the springs grab the cam and twist it away. Happens in both directions, hence my conclusion that it must right on the tip of the cam.

Installing the Crankshaft Pulley and Seal

Installing the crankshaft pulley and seal was a bit tricky. The pulley mounts on the end of the crank. The seal rides on a surface just behind the pulley, and slightly larger in diameter. The surface of the crank between these two area is beveled, so by turning the seal while pushing it will go right on. Unfortunately, the seal has to be mounted in the timing cover first, and the protrusions on the cover preclude any rotation while mounting it. If you just push the cover and seal into position, the edge of the seal will catch on the beveled lip on the crank and flip inside out. Somehow I imagine it will not seal effectively like that. Chrysler has a special tool for installing the crankshaft seal. I really don't want to buy one. I can't imagine ever having any other use for it. Besides, as specialized as it is, I am not even sure where I could get one.

So I improvised. I cut the ends off of a pop can and then cut about a one inch wide strip out of the side. I took the remaining piece, spread a little oil on it, wrapped it up on a circle and slipped it inside the seal. Spread the end of this rolled up piece of aluminum so it would go over the crank and pushed the timing cover and the seal into position. Then I pulled the aluminum piece out. Easy as pie. Don't know if it will actually seal or not. Seals are kind of funny. Old, ugly seals can work fine. New seals with microscopic defects can leak like a sieve. The seal suffered quite a bit of abuse while we were fooling around trying to figure out how to get it in position, and the edge of that aluminum is pretty sharp. I could have nicked the seal while I was pulling the aluminum shim out.

Installing the crankshaft pulley took a little work. It is a press fit on the perfectly round end of the crank, there is no key. There is bolt that holds it on. If the bolt had been just an inch or so longer, we could have used it to push the pulley on, but no, can't make it easy. I was able to knock it on using a block of wood and a small sledge hammer. Once I got it most of the way on, the bolt was able to grip the threads and push it home. There is a tab on the bottom of the timing cover you use with a screwdriver and one of the pulley's spokes to keep the pulley from turning while you tighten the bolt.

Wiring Harness

When connecting the wiring harness to the three ignition coils on the front bank of cylinders, I noticed that there were four identical connectors. This sucks. There is also a connector on a sensor mounted on the intact plenum that uses this same connector. So which one is the odd one? From this photo, I can see that the connector with the brown wire on top goes to the intake plenum. The ones with the green wire on top go to the ignition coils.

2016 June update added link to the whole story.

Tuesday, June 21, 2011

Lucille's, or Chrysler Sebring, Day 2


I made three trips to Lucille's Tool Store today. Couldn't figure out what size wrench I needed. The first trip I made this morning with my son and picked up a couple 18 millimeter wrenches: a socket and a combination wrench, but forgot to get the ball joint tool. After lunch I made a second trip with my friend Jack who had never been to this little slice of heaven. I picked up a couple of suspension joint tools and a 20 mm combination wrench. They didn't have a 20 mm socket. I was shocked. They had a place for it, but it was empty. When I got home I finally figured out that what I really needed was a 21 mm wrench, so back I went for a third time.


So now I finally have the enough tools and I was able to remove the left side steering knuckle, all of which was in preparation for pulling the half shaft. My on-line instruction manual says you just use a pry bar to pop it loose. Well, there isn't any room to insert a pry bar, so I went to talk to Eric (of Eric Heaton's Automotive, god of all things automotive). Eric was kind enough to fill me in, however the tale he told filled me with tredpidation. He's had to "pop out" these half shafts before, and it's an ugly business at best. His tool of choice is a six foot long, hundred pound torsion bar (from an old Chrysler suspension) with one end sharpened to a chisel point. Raise the car on a hoist over your head, set your stance, set your eye on the point between the transmission housing and the tripod joint and then STRIKE, O MIGHTY WARRIOR, with your mighty spear. If your aim is true, the clip on the shaft inside the transmission will compress, and the shaft will slip free.

I don't have a hoist. I have a Costco floor jack and a couple of antiquated jack stands. I don't have room to stand under the car, much less room for a six foot spear, nor do I have such a spear.

But maybe it won't be that bad, maybe they will just pop loose with a little help from my handy dandy two foot long crow bar, just like the instruction manual says. We shall see.

Update February 2017 replaced missing images.

Saturday, September 4, 2010

The Car Dun Blowed Up


No, you aren't getting into heaven. There's a stop sign in your way.

Dutiful daughter and I are driving our 2001 Chrysler Sebring back from Beaverton this morning and something goes wrong. We are almost to our exit, but we are still on the freeway and she's putting on the brakes. No, she's not, she tells me. Stepping on the gas has no effect. We coast to a stop half way up the exit ramp. The engine has died, and it won't restart. It cranks, but she no catchee. Fine, get out, open the hood. Uh oh. We've got brown oil sprayed over half the engine. Looks like it got blown out the filler cap. I don't think we're going to fix this with jumper cables.


Should we call a tow truck, or should we get my truck and try towing it with a rope? Well, is there any place to even tie a rope onto the car? Um, no, there isn't, not unless you want to hook onto the front suspension, and even then you are going to impacting the lower body work. So no.


Call home, wake someone up, they give us a number for a Hillsboro tow truck company. I call them and get put on hold for ten minutes only to be told that Hillsboro is not in their service area.


A Mexican dude pulls up on a fancy sport bike. He's wearing these cool motorcycle boots with what look like toe protectors. Says he's a mechanic so I show him the mess. He gives us the number of a friend of his with a tow truck. We call the friend. Two people answer, they are both yelling unintelligibly, then the phone disconnects. We try again similar result. Third time I think I am able to communicate. Guy tells me it will be 20 minutes. I spend the time arguing with my daughter and looking for treasure.

Half an hour later still no tow truck. Call him back, more garbled communication, something about a 460. I don't think he's coming.

'Bout this time my wife shows up. We finally get the correct phone number for Hillsboro Towing. Clear, prompt, businesslike communications. The truck will be here in half an hour. The girls take off and I wait for the truck. (I spend the time reading the Omnivore's Dilemma. Very interesting. Probably have to write something about it, if I ever finish it.) The tow company sends a flat bed for which they charge $55 for loading and $5 a mile for carrying. Much better than the $90 the first outfit wanted. And he even gave me a ride home.


Racial profiling: Three vehicles stopped to inquire about our status. Two were Mexicans and one was a white guy. A white guy on a bicycle came by and inquired, but he didn't stop. He didn't have a chain anyway. A cop stopped someone on the freeway right by the exit, but he didn't stop by. None of the new Beemers that came by stopped. Can't say as I am surprised, I generally don't stop either.

Update February 2017 replaced missing pictures.

Tuesday, June 29, 2010

2001 Chrysler Sebring Water Inlet


Car-car started getting hot and steaming. I had dealt with the cooling system before. I would have tackled this repair myself except that I have not figured out a simple, easy way to bleed the cooling system. Last time I ended up getting sprayed with coolant and I wasn't eager to repeat the process. Take it to the shop.

Picked it up this afternoon. $200. Seems the water inlet housing on top of the motor had cracked. It's not a very big piece, maybe the size of your fist. It's made of plastic and it cracked, a common occurance according to my mechanic. It's a dealer-only item and it costs a hundred bucks, which is beyond ridiculous, except that it comes with a sensor. Oh, that makes it alright them. <begin sarcasm> Right. <end sarcasm>

Update February 2017 replaced missing picture.

Friday, June 4, 2010

Cars: Fantasy & Reality

Took the car-car into Les Schwab this morning to get a slow leak in the left front tire fixed. I was leafing through a car magazine while I was waiting and I came across this:


Wow! What a car! It is a 1949 Delahaye Custom Saoutchik roadster. Now there's a car with style. Totally impractical, it's too big and it probably drives like a tank. But man, what a breath of fresh air. It's the total opposite of everything the automotive industry is producing these days.

While I am sitting there drooling over unobtainable supercars, tire man comes to give me the news. The good news is there is nothing wrong with the tire. The bad news is the wheel is leaking. Seems there is tiny pinhole, possibly a stress fracture, that is leaking a tiny amount of air.

About a quarter inch up the spoke from where someone marked a T in the dirt with their finger there is a little blob. The blob is made of tiny bubbles coming out of the metal. There might be a pinhole there, but I couldn't see it. But I could see the little pile of bubbles growing.

I bought a new wheel for $120, same as the ones I bought from them four years ago, except newer and shinier. I suppose I could have taken the wheel and tried to plug the leak from the air pressure side with some kind of goop, but I didn't even think about it till later, and there's no telling how successful that would be.

The standard fix for problem leaks like this with tubeless tires used to be to install an inner tube. Schwab won't do that anymore. They claim if the tire pressure gets too low the tire could slip on the rim and cause the valve to get ripped off the tube, which would in turn cause the tube to instantly deflate, causing you to lose control of your car, crash, die, and your survivors would sue Les for allowing such a thing to happen. Sounds bogus to me, but everybody is afraid of lawsuits these days, and anybody with any money has good reason to be afraid. Anyway, the leak is fixed and I don't have to fool with it anymore. At least not till next time.

Update February 2017 replaced missing pictures.

Tuesday, May 18, 2010

Automobile Window Regulators

Rear window lift on the car (2001 Chrysler Sebring) broke a couple of days ago. I thought about trying to fix it myself, but my list of things to fix is getting longer faster than I am knocking them out, so in the interest of expediency, and not getting the rear seat rained on, I took it in to the shop. Dropped it off yesterday morning and picked it up this afternoon. $300, but it's fixed. And I learned something.

Used to be passenger car window regulators, which is what the mechanism that raises and lowers the window is called, were composed of pair of arms joined with a pivot in the center so they formed an X shape.

Car Electric Window Regulator & Motor
The crank, or in this case, the electric motor, to lower the window was connected via a gear to the end of one of the arms. Doors were constructed with two panels of steel (inner and outer) and the window regulator was in between the two and could only be accessed through small holes in the inner panel. Getting the regulator out required ingenious contortions. Further, everything was made of sheet metal and all the edges were made extra sharp to insure that anyone who ventured into this hidden realm would emerge bloody.

Things have changed. Here is Eric with a modern window regulator. This one happens to be from a Volkswagen and costs $300 instead of $200 for the one for our Chrysler, but they use the same basic design. A piece of stamped sheet steel,


some plastic bits, and short length of steel cable.


The bottom edge of the window clips into the white carriage which rides up and down on the black track. The cable connects to the white bracket and runs around the two inch diameter pulley concealed in the triangular white plastic doo-dad. The motor, or crank handle, which ever you prefer, plugs into the center of the pulley.

You have to admire the simplicity of the design. Much easier to replace and install, assuming you know the little tricks needed to disengage the plastic do-hickeys. Very cheap to make. Can't be more than a couple of bucks in raw materials. Of course there is fair amount of work making the dies used to mold the plastic parts and stamp the steel ones. And then they turn around and sell it for $200.

The one we needed was only available from the dealer. If we had needed one for the front door, Mr. Heaton would have been able to get an aftermarket one, presumably for less money. I expect rear windows don't get used as much and so don't break as often, so there's not enough demand to make it worthwhile for someone besides the manufacturer to make them.

Update February 2017 replaced missing pictures.

Wednesday, April 15, 2009

Brake Clearance


Took the car-car into the shop last week for $1200 of tires and brakes. It has had a lumpy ride since the we first got it (used), and was even lumpier when you stepped on the brakes. I had the front rotors turned once before and that helped, but it didn't completely solve the problem. Darling daughter is back in town and driving daily, the rear tires are worn out, the brakes are nearing the end of their life, so I bite the bullet and get them all replaced at once. From all reports the ride is much smoother now. Nothing like nice, new, round wheels and tires to improve a car's ride.

I was checking it out when we got it back to the house and I noticed that the front brake calipers were durned close to the spokes of the left front wheel. There wasn't room enough in there to put a toothpick. I went out to take a photo yesterday and there is now enough clearance for a wooden match stick, so the pads may have seated a bit. Still, there are spring clips that are almost touching the spokes. Engineering really is a compromise.

Update January 2017 replaced missing pictures.

Wednesday, September 17, 2008

Sebring Cooling System


Sebring Engine
The first winter after we got this car I noticed the heater wasn't working, and with leather seats and a temperature South of freezing it was a bit chilly. My first suspect was the thermostat. The dealer wants $80 to replace it. $80! Shoot, I can replace a thermostat, so I go take a look under the hood. Well, there's a likely looking candidate. There is a thermostat size housing sitting on top of the engine, connected to the top radiator hose, right where you would expect the thermostat housing to be. This looks easy enough. Well, not quite. One of the screws is blocked by the plastic (!?!?) intake manifold, which means it has to come off, which means more shenanigans. Eventually I get it off, and pull off the thermostat-size housing, and look here, no thermostat. But what is even stranger is no coolant. I am sure there was a look of consternation on my face at this point.

OK, so we have learned two things. 1) $80 might be a reasonable price to pay for replacing the thermostat being as I cannot even find the durn thing, and 2) low coolant could easily explain the lack of heat, so there may be nothing wrong with the thermostat anyway. I mean the motor isn't overheating, even on longish drives. As a bonus I also learned that there are O-rings between the intake manifold and the engine, which means I did not have to go out and buy a new gasket. Sure, I should have replaced the O-rings, but this is a shade tree operation, we are not going to replace something just on some lab guys say-so.

Put the whole thing back together and now I need to refill the coolant. Problem with this car is that the thermostat-sized housing is higher than the radiator, so you need to bleed the cooling system. Further evidence of this is the bleed screw on the top of the oft-mentioned thermostat-sized housing. I experiment with various bleeding techniques, none of which work very well and at least one has the side effect of spraying me and the surrounding area with a mist of anti-freeze, but at last I am satisfied that I have gotten most of the air out of the system.

So things are working pretty well now, the car still runs and the heater works. But I come across some DIRE WARNINGS on the internet about mixing five year (orange) and three year (green) coolant and I decide the coolant should be changed. Not wanting another ethylene glycol shower, I take it to the dealer. They don't want to put green coolant in it, they want to use the high priced stuff. They have some techno-babble reason, so I relent.

That was over a year ago. But now when the car comes home after a longish drive it is spitting anti-freeze on the floor. A quick squeeze reveals that the top radiator hose is apparently empty. Come on guys, I took it the dealer, you are supposed to know that the cooling system needs bleeding. I suspect they didn't do it. We didn't discover a problem because my daughter was driving the car to school, which is only a mile away. The engine is barely going to get warm in that distance, you will never know whether the heater is working or not.

So now it's back in the shop. We shall see what they find.

Just got a call. Problem was the radiator cap had gone bad. It was only holding 4 pounds of pressure when it should have been more like 16 PSI. Only cost $45 for diagnosis, replacement and testing. So you're thinking $45 for a radiator cap? They only cost a couple of bucks at the discount auto parts store. But remember this car had been to two experts before this shop (me and the dealer) and neither one had detected the problem. I mean, when's the last time you had a radiator cap fail? I think he flushed the system to boot. Must have refilled it with the coolant that came out. I don't think you could buy the coolant for $45.

Update December 2016 replaced missing picture.

Sunday, March 9, 2008

Remote Entry

Our Mitsubishi Endeavor (a mid-sized SUV) has a remote entry system. Actually, all of our cars have this. The Endeavor is different in that: a) the remote control key fob is integrated with the key, and b) it has only one actual key lock on the outside of the vehicle.

The integrated remote control has its' pros and cons. On the plus side you only have the one do-hickey to keep track of. On the minus side it makes the key big and thick. I have a remote for my truck but I don't carry it around because I don't want the extra bulk in my pocket where I keep my keys. (I realize this may seem silly, maybe my pants are just too tight.) So anytime we go anywhere in the Endeavor, I pick up the key on the way out the door.

Sometime ago I noticed that there was no key lock in the backdoor, and no key lock in the passenger's door. The only outside key lock was in the driver's door. I wonder if this a preview of the future when there will be no mechanical locks at all and everything is done by remote control. I mean it is not too far fetched. They are building airliners that fly-by-wire now.

I am sure it is all part of a great conspiracy to eliminate all the old mechanical trades. Radios used to have mechanical presets. To set a radio button to a particular station you simply tuned to that station and then pulled on the button. Of course it wasn't really obvious. I did not figure out how to set the presets for a long time. I took apart a radio with mechanical presets one time. They were a marvel of mass production: full of complicated, tiny parts that worked with unexpected precision.

Now they are trying to get rid of mechanical locks. We got an after-market remote entry for our old Ford Windstar minivan. At the time, it was imperative that we have it. Probably had something to do with having little kids. It worked fine for a number of years and then it started to develop this bad habit of locking the doors all by itself. My wife got locked out a couple of times when she was getting coffee because of this. Recently the mechanical locks on the front doors started to act up: they just would not turn. Eventually I figured out how to hold my mouth, er, the key, so it would work. It was odd because it happened to both front doors at about the same time, and the drivers door is the one that gets all the use.

The Chrysler Sebring has it's own set of problems. It has remote entry, a special theft deterrent key and an alarm system. The remote entry has it's own key fob and works fine, or at least I haven't heard about any problems. The key has a padded handle that is maybe a quarter inch thick. It contains some kind of passive radio device that interacts with an antennae around the ignition lock. This means that if you need a new key you can't just get a copy made of the metal key: it won't work. You need to get a special key blank and then have it cut to match. And the blanks aren't cheap. They cost somewhere North of $35.

So just don't lose the key. But we still have the alarm system to contend with. First of all car alarms are one of my pet peeves. They do an infinitely better job of irritating people than they do deterring theft. Besides, that's why you buy insurance. Let the thieves steal the car quietly, without waking your neighbors up. Call the insurance company in the morning and go buy a new car. I know it's a bit of an inconvenience, but it doesn't ruin my sleep.

Anyway, the alarm system on the Sebring sometimes goes off for no good reason. Press the wrong button and it gets all upset, at loud volume, and only by going through the correct machinations can you get it to shut up. I tried to get it removed, but it is integrated into some other piece of electronics that is basically essential to the operation of the car. I think we have learned through trial and error, what not to do, so it has not gone off recently.

But back to the Mitsubishi. Just for grins I tried unlocking the drivers door with the key. It took a little finesse. First attempt resulted in my simultaneously turning the key and pressing the button in the key fob to lock the doors. Second, more careful, attempt worked fine. The ignition still requires a metal key. Never noticed a problem with locking the doors when turning on the ignition. I mean it wouldn't be a problem, but I have never heard the electric locks engaging at that time. I got used to using the key fob to lock this car because it is not clear to me which way to push the inside control button on the drivers door. If I drove it more than a couple of times a month I might get it sorted out.

Update June 2015: Replace missing picture of Windstar.
Update October 2016: Replace missing picture of Mitsubishi.